Over the past 7 years, the one tech tool that has been reliably my absolute favorite has been YAMM, Yet Another Mail Merge. This story walks you through the step by step of how to use it.
Disclaimer: no this is not a shill piece for yamm as they did not pay me for it even though they probably might as well at this point, just saying.
About Yet Another Mail Merge.
YAMM is a tool that allows you to send up to 1,500 totally customizable emails with amazing open & click rate per every 24 hours. This happens because from the receiver's vantage point, the email looks like you hit the
ComposeIf you have ever received State of the Noonion letter or the multiple hiring emails I sent over the years, THOSE ARE YAMMS! In fact, most of the emails you receive from me that looks kinda nice, it’s probably a yamm lol.
Okay - pitch over (honestly they should just commission me), onto the how to do it.
Step by step how to Yamm
Step 1: Create a google spreadsheet with a header row that includes Email
- Each email needs to be a different row. Email cannot be empty.
- Can include as many custom fields in the header as you want, such as Name, Company Name, URL, special note etc...
- Looks like this (order is not important)

Step 2: Install Yamm as a google sheet Add-on
- Click
Add-ons - Click
Manage Add-ons - Search for YAMM Yet Another Mail Merge
- Do an Individual Install
- The free version gives you 50 daily emails but I recommend the paid version. Up to you.
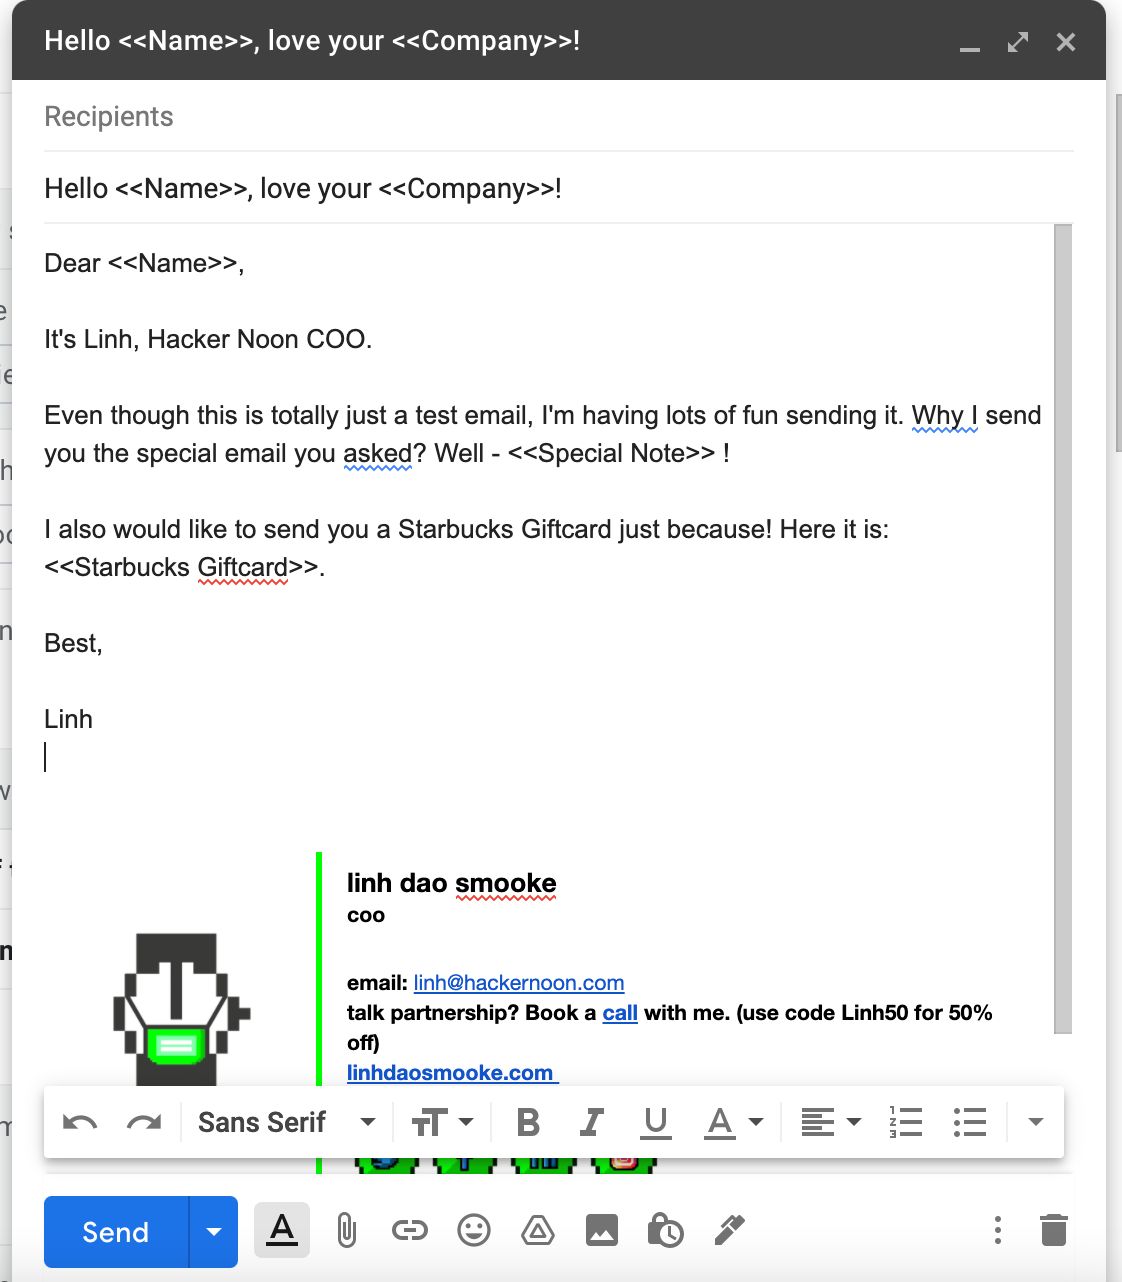
Step 3: Create the Email draft in Gmail
- Compose email like you would do normally
- Customize field by using this symbol
<< >> - Here's how it could look

Basically, whichever info you want to customize, put it in between the
<< >>Step 4: Test send to make sure your email doesn't look weird
- Click Add-ons
- Click Yet Another Mail Merge (If this is the first time you use it might have to restart the computer or reset spreadsheet to see the option)
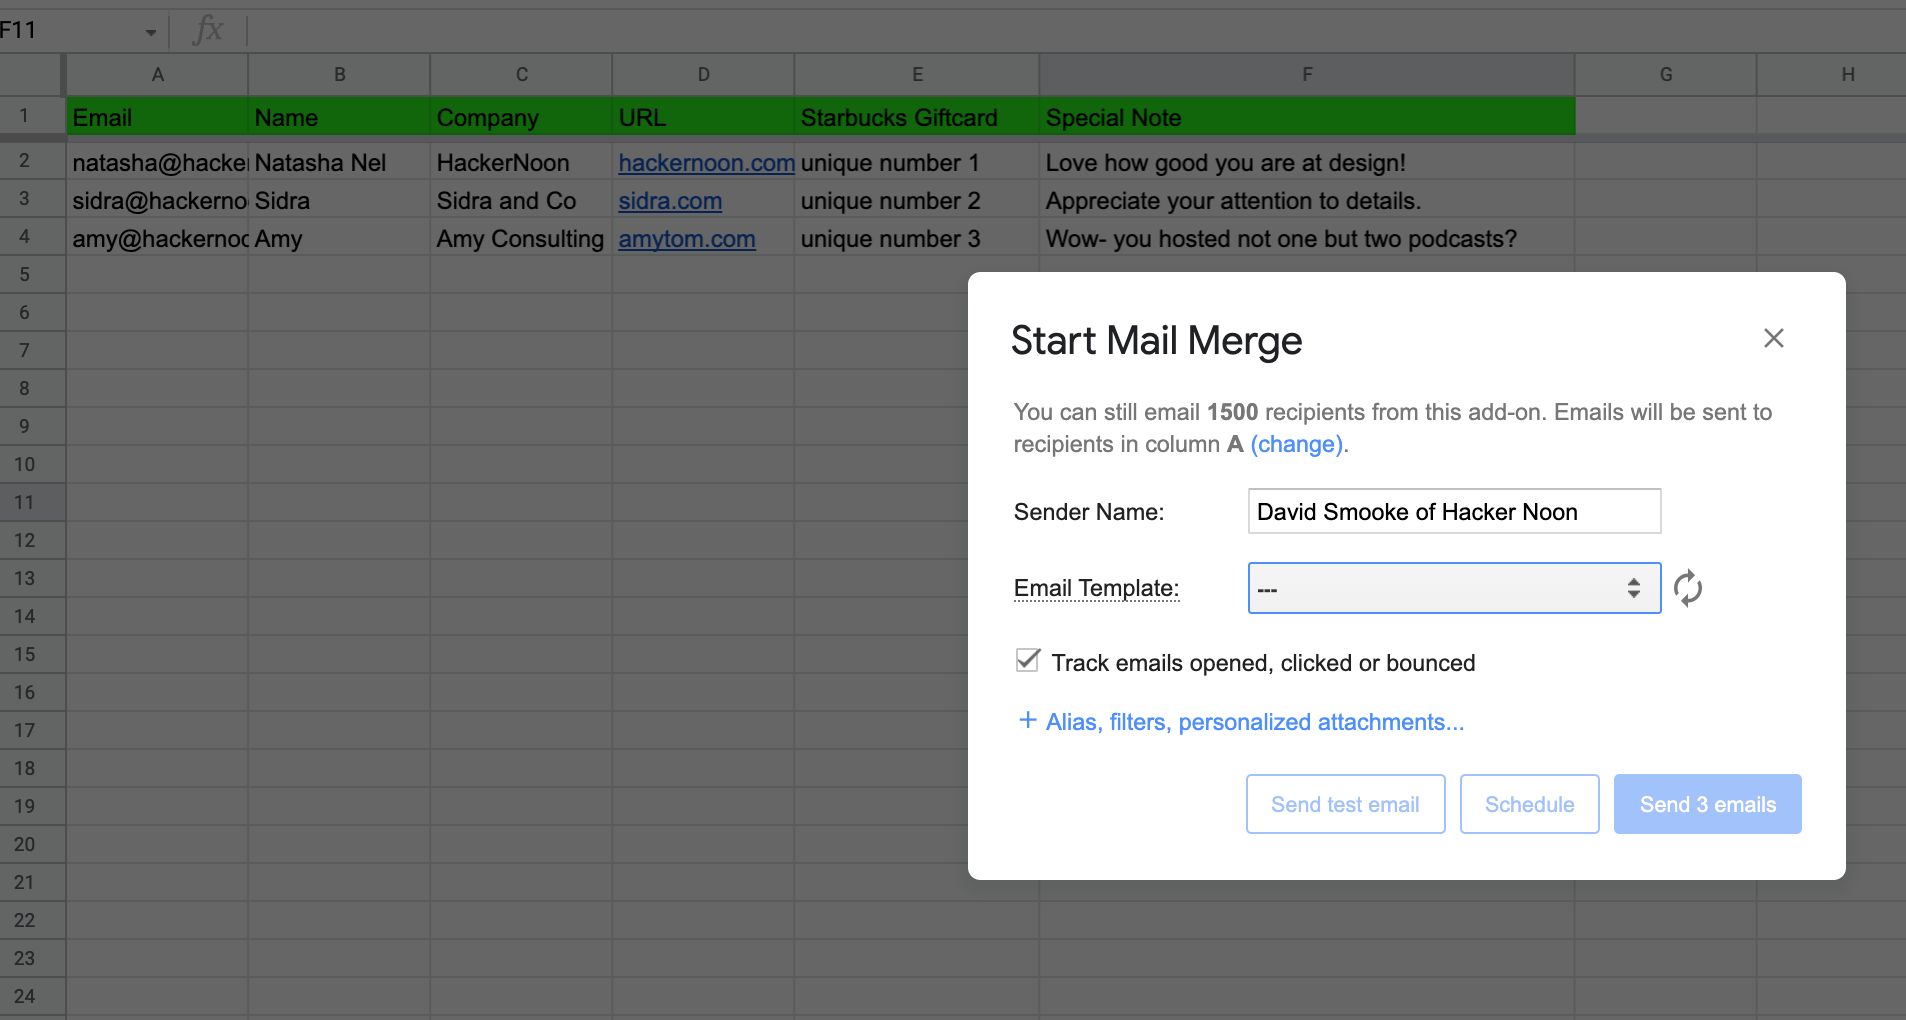
- Click Start Mail Merge
- Pro-tip: sign out of all your other Gmail inboxes and only the inbox you are sending the email from.
- A pop up will appear that looks like this:

- Then, click
Email Template - Select the draft that you just composed
- Click
Send Test Email - Find the email in your inbox and read through it
- Fix what needs to be fixed.
Step 5: Final touch up and send for real!
- And that's it! You are done!
- You will see a new column emerged called Merge Status
- When an email is opened, clicked, or responded to, Merge Status will change. Looks something like this:

Bonus
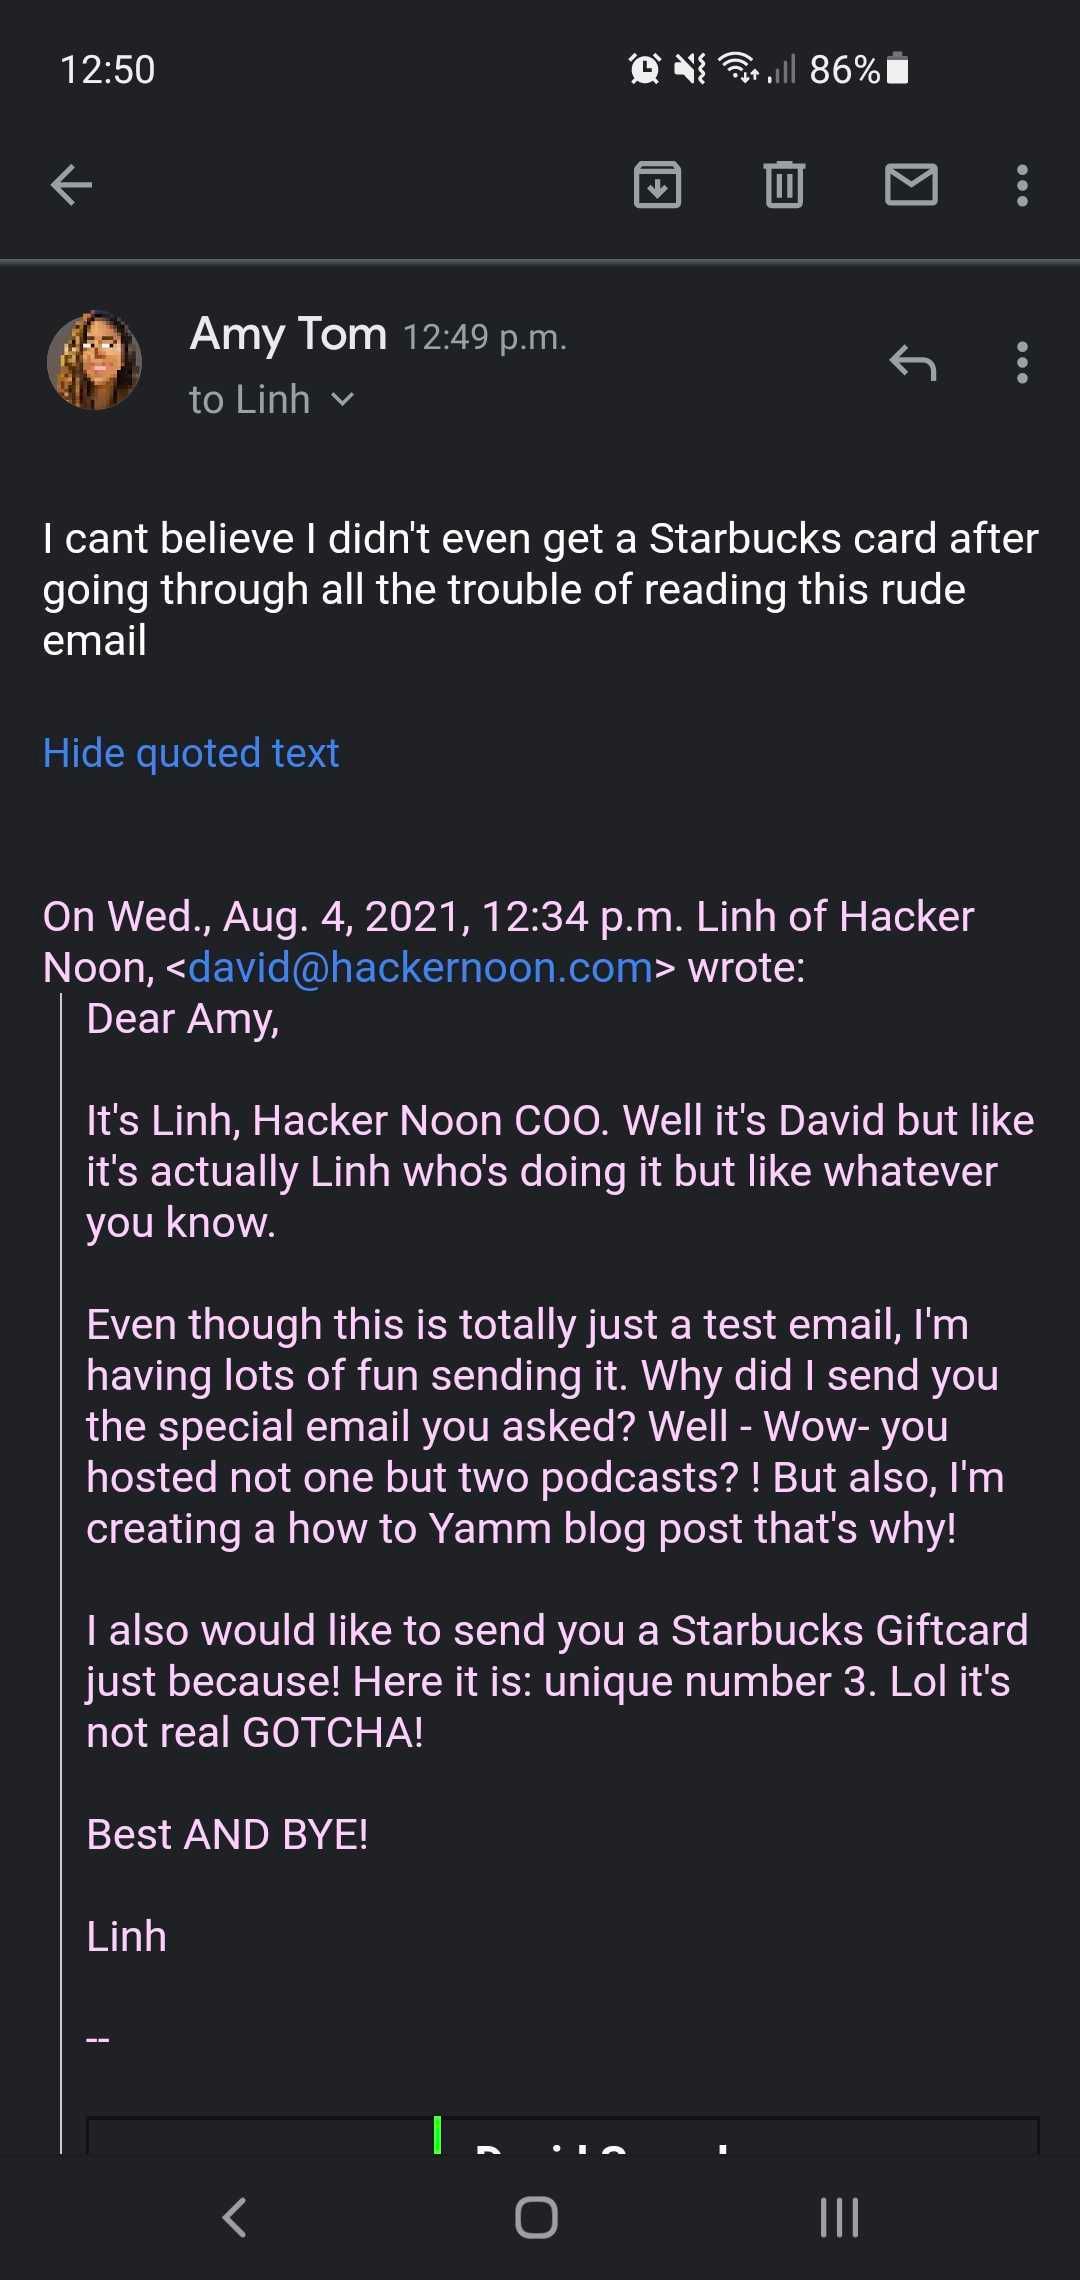
Here's a little Easter Egg gift for you if you read until here, the result of that test email I sent to my team:

Happy YAMM-ING! Also - yamm - if you happen to see this story, I think it's time to offer me this tool that I've trusted and used for 7 years, for free. I think it's only fair. 😉😉😉

